Thursday, May 13, 2010

I hope our guests are wearing stretchy pants...

Well, its official. Our wedding is going to be an eating extravaganza. Yep. An all night marathon of food. I hope our guests are preparing for this in advance...

Mommy Buttons and I had a final (hopefully) meeting with Carlouel last week. I swear, each time we leave from one of our venue meetings, my mom and I couldn't be in a better mood. Everything about our experience with Carlouel has been a dream. And the menu is no exception.

Remember our
first tasting? Well, guess what...we...nixed...everything...
After ruminating about our first tasting's selections, Mommy and Daddy Buttons brainstormed with me on what we would love to have at the reception. We were searching for variety, fresh foods, and a lot of different flavor profiles. After collaborating with Chuck, we were able to come up with what I consider to be a pretty amazing menu.

Get ready to start drooling...now...

Appetizers: Our guests will step outside for our cocktail hour immediately following the ceremony. They will be able to enjoy the following:

  • Crudite table set up with crackers, cheese, fruit, smoked fish spread, and artichoke dip
  • Lobster stuffed baby portabella mushrooms
  • Parmesan cups filled with grilled mixed vegetables
  • Caprese salad kabobs: 6" skewers with buffalo mozzarella, cherry tomatoes, and basil marinated in balsamic

source

  • Open faced grouper sandwiches
  • Poolside grill will be cooking kobe beef sliders to order
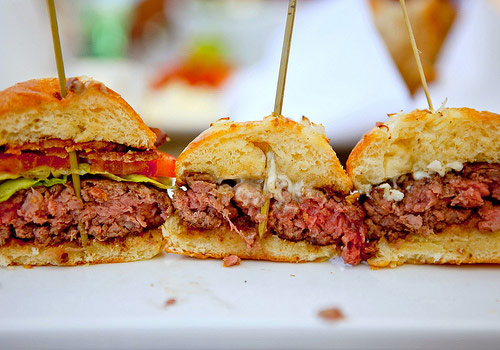
source


After the cocktail hour, guests will move inside to their reception table. Salad will be served at their seat.

Salad: spring mix with carmelized pecans, gorgonzola, and craisins. The salad will be dressed with my mom's recipe for honey lime vinegarette

We will then open up the five tasting stations for dinner. Each station will serve a small plate of food (salad plate size), and guests will be able to take one plate, sit at their table, and come back for multiple tastings. The stations are as follows:

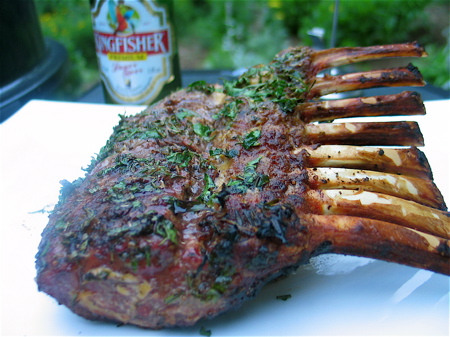
  • Baby grilled rack of lamb with a light herb seasoning, served with tzatziki sauce, rosemary roasted red skin potatoes, and asparagus


source

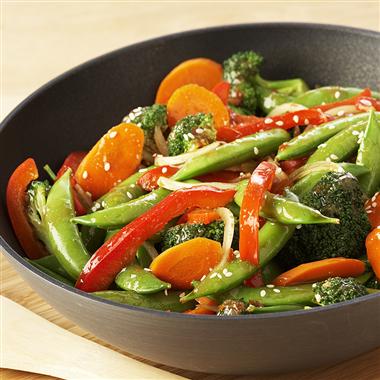
  • Stir fry: choice of chicken, pork, or shrimp. Served with stir fry vegetables, sticky rice, and chopsticks


source

  • Chilean sea bass, served with julienne vegetables. Guests will have a choice of chimmichurri sauce or mango salsa
  • 5oz petite filet mignon, served with a spinach souffle and au gratin potatoes
  • Mixed veggies (black beans, corn, tomatoes, green pepper) and chicken, served in a homemade taco shell bowl, topped with cilantro, guacamole, cheese, and salsa

source


About 45 minutes after dinner is complete, we will cut the cake. It will be served on a table with a coffee service and the following desserts:

  • Mixed berry tarts

source


  • Mini key lime pies


source

  • Assorted cookies: chocolate chip, oatmeal raisin, and white chocolate macadamia nut

source


At this point, guests might think that the night is over and they can be wheeled out to their cars; most likely with their pant buttons unbuttoned to accomodate all of the food they just ate. But wait...there is one more detail to our menu for the evening...

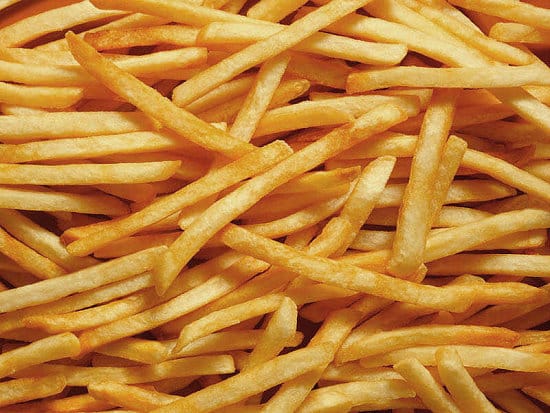
A french fry bar!
I really liked the idea of having a "late night eating encounter," and so we added one on! We will be serving:

  • Fresh made french fries in paper boats
  • Condiments: ketchup, malt vinegar, season salt, nacho/melted cheese, bacon bits, green onions, jalapenos, and sour cream

source


source

  • Chocolate milk shake shooters!!!!

source

When Chuck suggested the french fry bar, I think my brain went into wedding bliss overload. Whenever I have a night of drinking, I usually start craving greasy food: pizza, french fries...perhaps a pot of Kraft mac n cheese. To me, this will be the perfect ending to our evening; I hope our guests will enjoy the surprise (or, lack of surprise if any of them happen to be reading this)!

So...are you full just thinking about the amount of food that will be served at the Buttons' wedding??? I sure am!


What is your favorite item on your wedding menu? Are you adding any late night treats for your guests?

Wednesday, May 12, 2010

Wedding cake: Take 3


In my previous cake-related post, I was pretty frustrated with the entire cake designing process. Since we were only about a month and some change out from the wedding date at that point, panic had officially set in. Must...find...baker...NOW!

I consulted various wedding vendor directories for my area, and frantically sent out emails/inquiry forms to about a dozen, hoping that they would be available on my date! After sending out the S.O.S.'s, I sat back on the couch for a moment of respite. About 20 minutes later, my phone rang. It was one of the bakers, returning my inquiry...talk about a quick response! She was very sweet on the phone, and we set up a meeting for later on in the week.

On the day of the tasting, Mr. Buttons, Mommy Buttons, and I met up at The East Lake Cafe, which is where Cakes by Nomeda is located. The cafe is only open for breakfast and lunch, so when Nomeda met us at the door, we had the restaurant to ourselves. We sat down around the table, and she presented us each with a plate full of FOURTEEN different cake samples!

I instantly began to drool at the impending deliciousness.
Nomeda makes both American and European cakes. At first, I was confused; I had no idea about this! But, once we started to taste them, we could detect the difference in texture between the two. You are most likely familiar with American cakes (I think...). However, in comparison, the European cakes were denser and had a smoother texture to them. Both were delicious though! I'm sure you are curious to know the different flavors we tasted! They are as follows, starting at the top and working clockwise around the plate:

American cakes:
Chocolate with toffee creme
Chocolate kahlua creme
Red velvet
Vanilla with vanilla buttercream
European cakes:
Signature cake (it features nuts as a layer; you can choose pecans, macadamia nuts, etc.)
European chocolate cake
Hummingbird cake (a spice cake with pineapple and pecans)
Champagne cake with strawberry creme
Amaretto creme
Orange creme
Lemon creme
Raspberry creme
Mango creme
Vanilla creme

We worked our way around the plate, eating half of each sample so that we could go back a second time to re-try any that we liked. We instantly eliminated the berry creme-related flavors, as the three of us all tend to gravitate towards the richer flavors (I'm a fiend for chocolate). All of us loved the hummingbird flavor; it was one of the most unique cake flavors I have ever had, but it was absolutely to die for! It reminded me of coffee cake almost (it features pecans, pineapple, and banana; it is a southern cake). Although, it did come with a higher price tag per slice than some of the other flavors. After finishing the samples, we each shared which flavor was our favorite. Mr. Buttons quickly stated that the amaretto was his, and Mommy Buttons liked the chocolate kahlua creme. I was stuck between the hummingbird cake and the chocolate toffee creme. Thankfully, the cake flavor only has to be solidified a week or two before the wedding, so we had time to think about it at this point before making decisions!

After tasting the cake, it was time to discuss the design! We paged through Nomeda's HUGE book of previous cakes; there were so many lovely cakes that she has made in the past! At that point, I pulled out my design inspiration picture, along with my cake topper:

I took a deep breath, expecting a similar response to the previous baker. Instead, I was met with excitement! Nomeda informed us that she has had 2 years of training in specialty lacework for cakes, and that creating a design similar to my inspiration would be an awesome challenge for her! After inspecting the design, she told us that she would make the lace design itself out of fondant, instead of piping it on the cake. When it is time to cut the cake, the lace can be pulled off easily. Awesome! We decided that the lace work should be in white, and the cake itself should be a beige/champagne colored fondant to match the tree on our cake topper. I know, some of you may be thinking, "yuck...fondant tastes awful," but guess what? Nomeda imports white chocolate fondant from Switzerland. It is rolled out to be only about as thick as a few sheets of paper, and it tastes good! Typically, bakeries use a sugar fondant which is thicker, tougher, and might not be pleasant to taste. I was so happy to hear that the fondant on our cake would be edible!

Then came the issue of pricing. I was on pins and needles to hear the quote, because after pricing out the previous bakeries, I was starting to realize how incredibly expensive wedding cakes can be! However, I was incredibly surprised (in a good way!)! Nomeda charges a very reasonable price per serving for her cakes, and she DOESN'T charge any extra fees for her design work. SCORE! On the way home from our meeting, Mommy Buttons and I stopped by Publix to price out the same size of cake, just for a comparison. Guess what...the same size cake at Publix would have been around $100 more (and you have to select your design from a book)! I couldn't believe it.

So...as you can probably deduce...our deposit was in the mail ASAP! I am really looking forward to working with Nomeda, and I can't wait to see how the cake turns out on the wedding day!


Did you taste any unique cake types/flavors at your tastings? What flavor(s) are you hoping to select/did you select?

Sunday, May 9, 2010

Happy Mother's Day, Mommy Buttons!


I wanted to stop and take a few minutes to talk about Mommy Buttons. I mean, it IS Mother's Day after all...

I feel like I'm probably biased, but I really do believe that I have the greatest mom in the entire world.

From the tender age of about 2 or 3, she somehow managed to put up with my many neuroses (for instance, my food had to be placed in specific locations on my plate, or else I freaked out...I could list a few more, but you might think I'm insane).

She had to deal with this face...I'm not sure how she survived...

Still, she kept on humoring me by cutting my PB&J sandwiches out with cookie cutters (can't have crust!!!) and packing them in my lunch bag with sour cream and onion chips and an orange Hi-C juice box (I ate this pretty much every single day...I was a strange kid). Ah, a mother's love, right?

My family relocated a number of times during my childhood. I had new schools, new houses, and I had to make new friends. Consequently, Mommy Buttons turned into my best (and most constant) friend.

And...to this day she still is! We shop together, we cook together, and we chat like girlfriends on a daily basis. If I need advice, I turn to her. She has always been one of my biggest fans.

So, for the past 11 months, she has been right there beside me during the wedding planning process. From conceptualizing decor, to vendor meetings, to dress fittings and the like, she has been there for everything. And, in a few short days, all of our planning will come to fruition. I'm not sure that I know how to thank her enough for all of her help...in planning and in life in general. So, for now, I just wanted to say -

I love you mom! Happy Mother's Day!

Friday, May 7, 2010

A petaled pomander


Our flower girl is 3 years old. Certainly, it is a precious age, and I have no doubt that she (and her brother) are going to steal the show at our ceremony. Because Flower Girl A is so young, I thought it was safe to assume that she doesn't yet understand the concept of a flower girl, and that they typically scatter petals down the aisle. So, I opted to create a pomander for her to carry. I am happy to report that this was one of my easiest projects to create!

I utilized the following materials:

  • 5" styrofoam ball (you can use bigger/smaller depending on what you prefer)

  • ribbon (about a yard)

  • screwdriver

  • silk flowers

  • hot glue gun

Now, for the instructions:


1. Using a long screwdriver, carefully punch a hole through the styrofoam ball from one end to the other.


2. With either the screwdriver or another thin instrument (we used the end of a garage sale sign stake that was sitting around), fold the ribbon over the end of the utensil and push through the hole. A loop will be created at one end of the pomander this way, with a tail of remaining ribbon at the other end.


3. Pull the loop/handle to desired length and tie a knot at the opposite end of the pomander (the "tail" end). Cut the ribbon ends to make a tail of desired length

4. Pop the silk flowers off of the stems. Punch a small hole in the styrofoam ball (with either the flower itself, or the end of a pencil, etc.) where you'd like the flower placed. Remove the flower and fill the hole with a dot of hot glue. Place the flower bud in the glue. Let dry.


5. Repeat this process to cover the entire styrofoam ball. Make sure that the styrofoam is not visible at different angles.

Voila! Your pretty petaled pomander is complete and ready for its walk down the aisle with the flower girl!


Did you have/are you having a flower girl? What is she carrying?

Wednesday, May 5, 2010

Ginormous hair flower: a tutorial


After a multitude of requests for a hair flower tutorial after debuting my ginormous creation the other day, your wish is my command!

A few months ago, you may recall that I showed you my fabulous hair flower find from Etsy. At the time, it was perfect; it matched my dress, had lace detailing and featured some pearls. But, afer sitting on it for a few months, I started to have doubts. I began to think that perhaps the flower wasn't large enough to make the statement that I had envisioned. Since I am not wearing a veil, the flower needs to be my "statement piece," if you will. So...I thought that I would try my hand at making one myself!


1. To start, I purchased an ivory colored peony from Michaels to use for the petals, as well as some ivory thread and champagne pearl beads for the center of the flower.
  • Note: make sure you find a flower with loose petals that will detach from the center of the flower (the center piece should come out). If you select a flower with petals that are glued together, you will not be able to get it to lay flat on your head as easily!


2. Pop the flower off of the stem and separate the petals.

3. Next, I arranged the petals in a stack to my liking. I noticed that the flower was a little larger in diameter than I would like, so I also incorporated a trick to decrease it!


4. I took the 2 largest petal shapes and cut them apart so that each petal was separate (or in pairs).


I then used straight pins to fasten them in place, and I sewed a few stitches to hold them to the flower petal shape used for the bottom of the flower. With this method, I was able to maintain the fullness of the flower while simultaneously making it smaller in diameter.


5. Layer by layer, I pinned the flower petals back together in a stack. I used this technique to ensure that the petals wouldn't slip and shift as I was sewing the flower together.


6. Next, I sewed champagne pearl beads to the center of the flower one at a time. I tried my hardest to place my stitches in close proximity so that they were easier to cover up when I finished.


7. I cut a scrap of plain ivory fabric into an oval shape, and sewed a hair comb to it. You could fasten a thin barrette or other clip as well if you prefer.


8. Using a few straight pins, I attached the comb piece to the back of the flower. I then tested the placement of the comb in my hair. DEFINITELY make sure you do this before completing the hair piece; if it is too high/low, the flower might flop around awkwardly on your head! I actually left my comb pinned/didn't finish the flower completely until after my hair trial. At the trial we tested the comb placement, and I was able to adjust to make certain that it was in the ideal location!

9. Using a hot glue gun, attach the fabric/comb to the back of the flower. Let dry.


Annnnnnd voila! There you have it folks, a ginormous hair flower (well, it doesn't HAVE to be huge if you don't want it to. Mine is though)! Although I didn't do it, you could definitely add feathers or other fun flair in between the petals as you are sewing. Make it your own and be creative!

Ok class...questions? Comments? Concerns? Compliments (haha...)?

Sunday, May 2, 2010

Pamela Anderson, I am not...


So, I went in to CC's Boutique last week for my first fitting. I won't go into too many details about the experience because I think that all around, many girls have slight mental meltdowns during this appointment. I did. Let's just suffice it to say that when your dress doesn't fit you yet, it is easy to start having doubts, to be nitpicky about every detail, and just to freak out in general.

But, what I DO want to talk about is boobs. Yep, boobs. And...the fact that I don't really have much of them. But...my dress has enough space in the chest for some enormous melons. When I went in for the fitting, the first question the seamstress asked me was if I had a corset bra/other bra to wear. I told her I just wanted cups sewn in (I mean...I have no boobs...I don't need the support!). So, we proceeded to put on the dress, and she stuffed in some 2 inch thick pads into the chest.

After pinning the dress in certain areas (it looks like it will have to be taken in on the sides about 2 inches, and we have to add some nips and tucks to the back so I don't have a saggy looking butt), I walked around the room in the dress, trying to take note of how it felt and if there were any problem areas. I was feeling pretty good, but when I went to do one of those "boob adjustments" where you push your strapless dress up so it isn't falling down, she told me that she thought I would need a corset bra. My heart sunk a bit, but I humored her and said I'd try one just to compare. She whipped one out of the closet in my size and we put it on.

So...let me paint you a picture of the new get-up. I am corseted into this bra device...which is already padded. The seamstress then proceeds to hand me the 2" pads again to stuff inside the bra. Um, what? Seriously, this increased my chest size by about 3 inches. When we zipped the dress back up, it certainly was more secure...but I looked as though I had had some work done...

So, I'll be honest here. I'm not one of those girls who wishes for bigger boobs. Really, I'm not. I think I look perfectly proportional, and I just don't feel the need to make myself look more...enhanced...when everyone I know is aware of what I look like on a day-to-day basis. So, after looking long and hard at myself in the mirror with my increased chest, I told the seamstress that I didn't want the corset bra on top of the sewn in cups (I have to have SOMETHING in there, apparently). We took it off and I was able to look at myself again in the mirror. I was happy with what I saw...whew! Now...I just have to wait a few weeks to see the changes at my second fitting. Oh...and I'm sure you'd like some photos about now...your wish is my command!

My fabulous hair flower also managed to make an appearance...


Someone is going to have a heck of a time bustling my dress...although it looks simple, it is going to be a complicated process!


After everything was all said and done, I did start thinking about what transpired at the shop. Do all seamstresses attempt to force added boobage on you, or is this an isolated incident? Why would they automatically assume that I want a bigger chest? Did you run into this problem at your fittings? Did you feel pressured to add more padding/enhancement aside from what nature provided you?