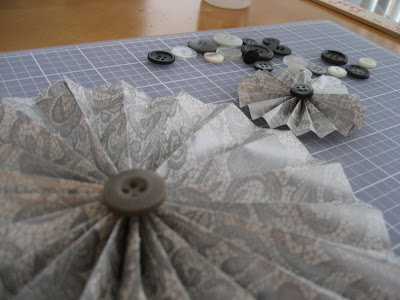
Previously, I showed you my pinwheel inspiration, and my first attempts at the project. Today, the tutorial!
First, I searched high and low for the paper I wanted to use. Ideally, I would use scrapbook paper because of its thickness/sturdiness. At first, with 300+ pinwheels to make, purchasing scrapbook paper at 60 cents a sheet (or buying one sheet a week with a 40% off Michael’s coupon), seemed too costly AND time consuming. It seemed like I was on an endless search for paper, and originally found one solution in the least likely of places…THE DOLLAR STORE!
Yes, no lie! I was walking through the Dollar Tree to find something, and I walked by their gift wrap section. They had bins filled with wedding-related gift paper, and I started digging though the containers like a scavenger. What I came out with was…this!
It is ivory paper with a platinum/silver floral print. I purchased the roll and brought it home. When I set it next to our centerpiece vases, I was pleasantly surprised! It coordinates amazingly!
So, lets get started!
1.) I used a yard stick to measure out a 3 inch wide strip of paper.
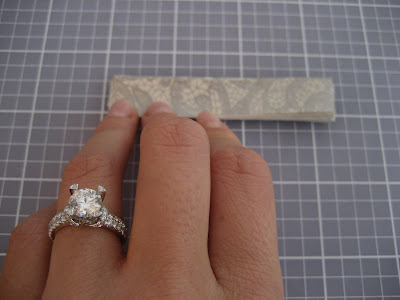
2.) Next, I cut the strip to measure 12”x3,” which left a 6”x3” extra piece…which I cut down further to make two 6”x1” strips for a small pinwheel!
3.) For the larger pinwheel, I made ½” accordion pleats*. I was left with two accordion strips.
4.) At the end of one strip, I squeezed a small line of 3-in-1 Advanced Craft Glue (the fast drying stuff…although you could use tacky glue if you want…I like instant gratification though!), and then connected the two strips into one long one.
5.) Leave the strip to dry for a minute, and then connect the two exposed ends together. You will be left with a crinkly circle…it kind of reminds you of one of the coffee cup sleeves you get at Starbucks!
6.) When that dries, it is time to flip the paper into a pinwheel! I place my thumbs on the top of one end, and my other fingers on the other side, then twist my wrists so my thumbs come together. This part, at first, made me really nervous, but once you have the paper flipped, you are able to fix the edges/refold any pleats that you might have stretched out.
7.) Add a generous dot of glue to the center of the pinwheel to hold it together. Let dry.
8.) Finally, place a dot of glue on the back of a button, and set it in the center of the pinwheel. And…voila!
Now…I’m going to repeat this x300…
If you are looking to create some pinwheels of your own, this can be one of the most cost effective projects to dive into! The wrapping paper I purchased is 15 square feet, and according to my calculation, I will need 5 rolls, so I bought 6 to be safe...which came out to a grand total of $6.42 for all of the paper! In an ideal world (like I already said) I would use scrapbook paper because it is much sturdier, but I think that wrapping paper is a great alternative option! My grandmother has TONS of buttons at her house, and she sent me a box of them for the centers, so that aspect of my pinwheels is free! I purchased the glue at Michael's with a 40% off coupon for less than $3. I might need to purchase an additional bottle as I get farther into the project...but I'm not too worried about it at this point!
How are your DIY projects coming along?
*For my smaller pinwheels, I used ¼” accordion pleats. You might need to try out a few different widths before you find what you like!


That's so funny! I have that EXACT paper in the trunk of my car from Dollar Tree! When I saw it, I thought, "I know I can do SOMETHING with this". And now you've given me a great idea! Thanks. BTW....yours came out great!
ReplyDeleteLove your ring! =p
First, your ring is gorgeous! I don't think I've ever seen it before. Love :)
ReplyDeleteSecond, you're awesome for taking this on. Just reading through the tutorial made my brain hurt. So glad you were able to find such a great deal on the paper, though!
I'm seriously impressed! DIY scares the bejeesus out of me, so way to go!
ReplyDeleteThose are so cute! And I agree with Em, your ring is SO pretty!
ReplyDeleteThose are so awesome! They don't really seem TOO difficult! You did a great job!
ReplyDelete& Your ring is beautiful!
They look really cute! Your ring is gorgeous though! :)
ReplyDeleteGirl, while looking at this tutorial I was blinded by your ring! I need my shades, so pretty.
ReplyDeleteThank you for this tutorial. You made it look really simple.